


One of the most significant restrictions to a YJ’s axle articulation is the front sway bar. The sway bar is necessary for maintaining on-road stability, especially during emergency maneuvers and sharp turns, so you don’t want to remove it completely from a daily driver. This leaves two options.
The first option is to keep the stock sway bar links and simply pry them off with a pry bar before each wheeling outing. I used this “poor man’s disconnect” for four years. Prying the lower end of the sway bar links off the spring plate studs is difficult at first, but it gets easier the more you do it because the rubber bushings get more supple. In spring-under configurations, it’s easy to just use the shock mount as a fulcrum for prying. In spring over setups (like mine), the only thing left to pry against is the shock itself. This obviously isn’t ideal, and quickly scratched the paint off my shiny new RS9000’s.
The second option is to buy a set of pre-made quick disconnects from any of numerous manufacturers for $60-80 per set. These generally replace your stock sway bar links with two-piece links joined by a hitch pin. Simply pull the pin at the trail head to disconnect the sway bar, and re-insert it before you hit the highway again. It’s the epitome of convenience, but $60+ just seemed kinda pricey to me.
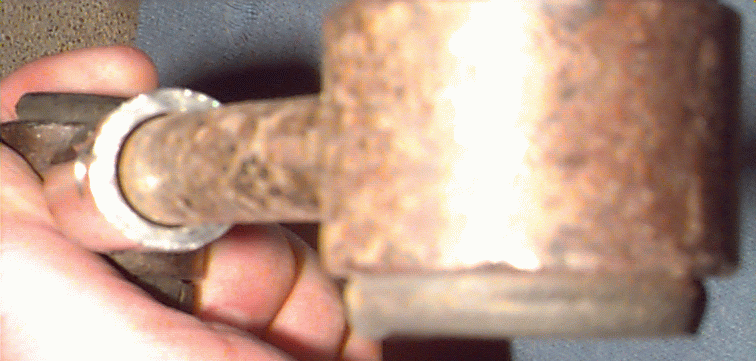
I chose to make my own quick disconnects by hacking up my stock sway bar links. I simply cut the old link in half, welded a metal sleeve to the upper half, and drilled a hole through the lower half of the sleeve and the upper end of the lower link for the hitch pin. Simple, huh?
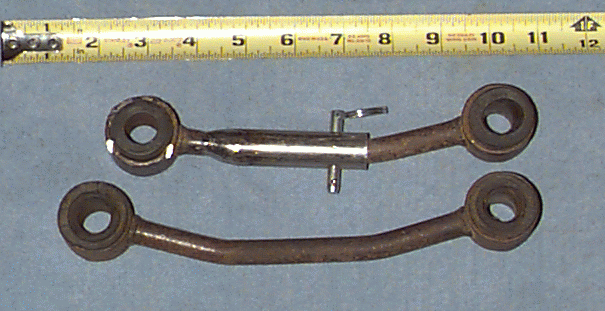
Quick disconnect fitment
The stock link is 1/2″ in diameter, but I wanted a somewhat loose fit to make reconnecting easier. I had a hard time finding steel tubing of the proper size, but eventually found what I needed at Kriha Fluid Power here in Lincoln, NE. Since I only needed 6″ of it, they were kind enough to give it to me free from their scrap pile! I ended up with 3/4″ OD, .095″ (13 awg) wall tubing, which amounts to 9/16″ ID, 3/32″ wall. I’d been hoping for a somewhat thicker wall to handle the stress that the sway bar undergoes, but this is all I could find without special ordering a large quantity. Time will tell if it’s strong enough. 7/8″ tube with 5/32″ or 3/16″ wall might be better.
The next step was to hunt down a cotterless hitch pin to hold the two halves together on the road. 1/4″ diameter pins are common, but that would have left only 1/8″ on either side of the hole in the lower link. That didn’t seem like enough material to me, so I hunted unsuccessfully for a 3/16″ pin. I finally gave up and used 1/4″ pins for $1.59 each. We’ll see how well they hold up.
Conveniently enough, I’d been given a spare set of sway bar links by a fellow Jeeper who had gotten commercial quick-discos. I used this to experiment on so I’d still have my originals intact if this project didn’t turn out as I hoped.


The basic steps:
-

Quick disconnect length
Cut the stock sway bar link in half. My spring-over conversion had raised my lower link studs and made my current links too long, so I cut about an inch of material out of the middle of my stock links.
- Slide the upper half of the link halfway down into a 3″ section of tubing and weld the tubing in place.
- Slide the lower end of the link all the way into the tubing, then pull it out 1/16-1/8″ to allow room for the crud that will inevitably collect up there while wheeling. Make sure the eyes in both ends of the link are perfectly parallel, then clamp / tape / whatever the two pieces together so they can’t move around.
- Drill a 1/4″ hole through both the middle of the tubing and lower link, about 1/4 of the way up from the lower end of the tubing.
- Give the new links a fresh coat of paint so the freshly-bared metal won’t rust, making the disconnects hard to operate.
- Remove the old stock sway bar links from the Jeep and install both ends of the new sway bar links. PB Blaster and a BFH come in handy for removing the old links.
- Enjoy your new quick disconnects, and brag to all your friends about how little they cost you.
After a few days of driving around, I do hear some knocking coming from the front suspension which I’m assuming is caused by the lower pin of the discos not fitting snugly into the upper tube. It’s very minor and probably wouldn’t be noticeable by anyone but me. Time will tell if this movement leads to any weakness in the discos or causes the pin to work its way out of the hole.
On their maiden highway voyage, I had to make an emergency stop/swerve to miss a cat crossing the road, and the discos held up just fine to the stress involved. I guess they passed their first test.