


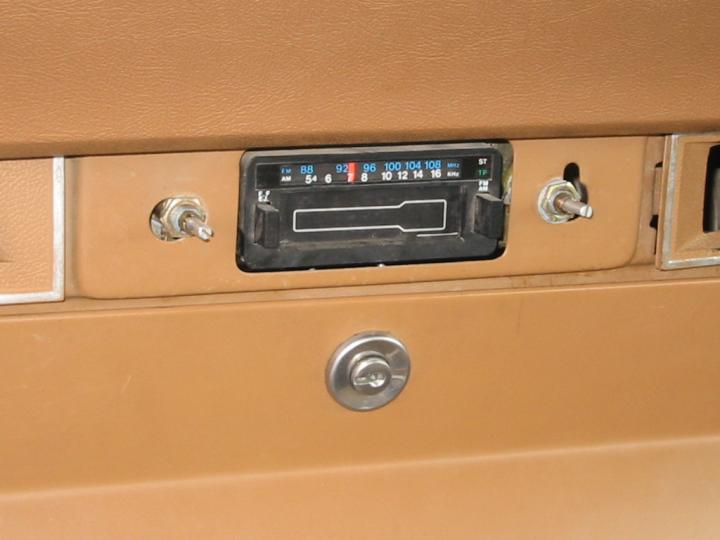
Most older full-size Jeeps (FSJ’s), at least up through 1985, came with old dual-post radios in the dash, located above the glove box between the ash tray and the clock. Since you can’t buy dual-post CD players these days, many people replace these old radios with the now-common DIN-sized stereos. People do this in different ways — some people put the stereo inside the glove box, some put it inside an aftermarket center console, etc. In my 1977 Wagoneer, I chose to cut a DIN-sized rectangle out of the dash where the old radio used to be and locate my new stereo there. The location is very convenient, and I didn’t have to take up valuable storage space elsewhere.
Update: this was done back in 2002. Fifteen years later, there were retrofit stereos available from RetroSound that fit into the old dual-knob dash boards, but contain digital stereos and bluetooth media receivers. No dash hacking necessary. I’d have probably gone this route if it had been available back in 2002.
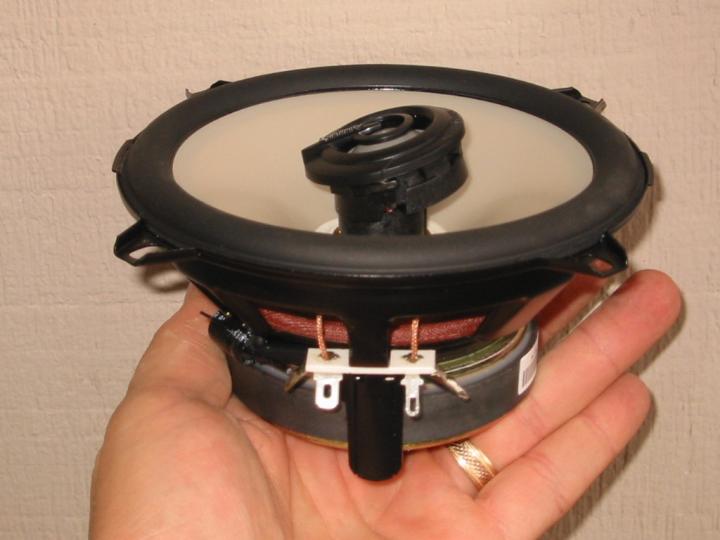
I’m a bit of an audiophile, so I decided to replace the speakers and wires as well and replace the whole system with something nice. The reviews that I read various places (like EPinions.Com) indicated that Alpine was the best sounding deck you could get for a reasonable amount of money. I wanted to avoid ugly, flashy displays, which was another reason to go with Alpine. I also wanted the ability to play MP3 data CD’s and the option of installing a CD changer somewhere down the line. I opted for the Alpine CDA-7894 head unit and a pair of Infinity 552i 5.25″ speakers to replace the tired original speakers in the door kick panels. I have Infinity speakers for my home entertainment system, and I’m quite happy with their accuracy for things like Jazz and acoustic music. With a spool of 16awg speaker cable and sales tax, this set me back a little over $500. Both Circuit City and Crutchfield sell these components for similar prices.
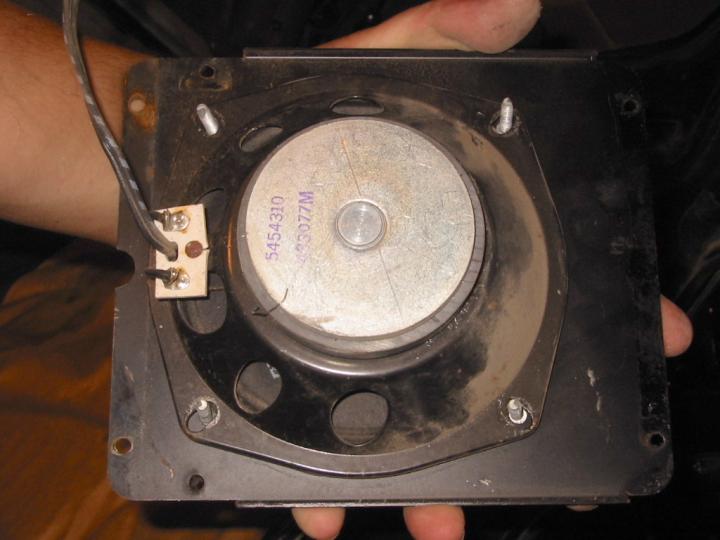
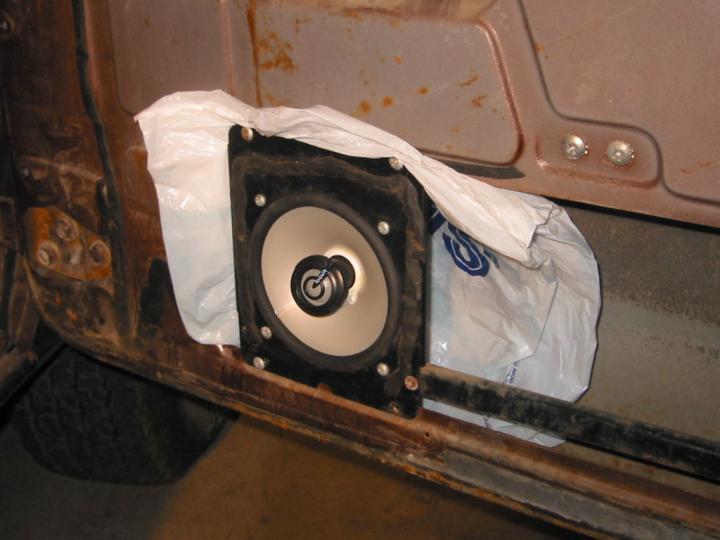
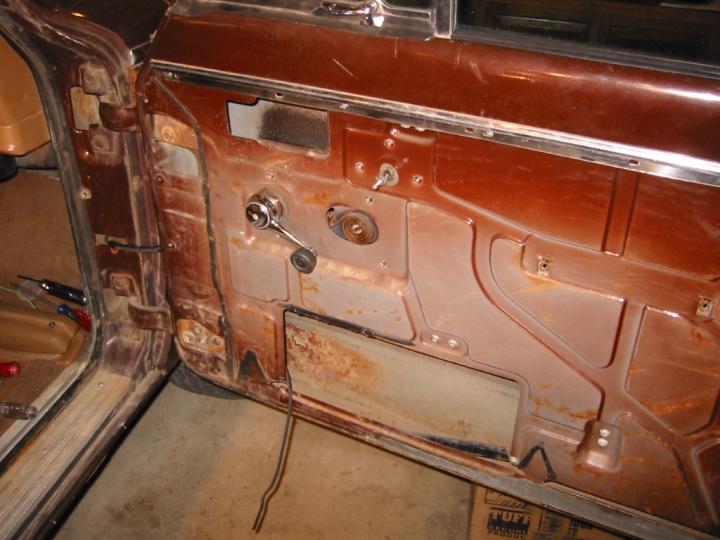
Front door speaker
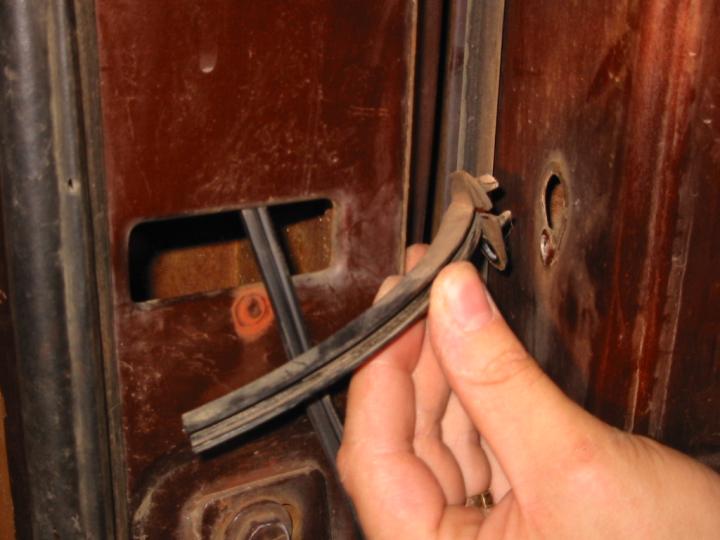
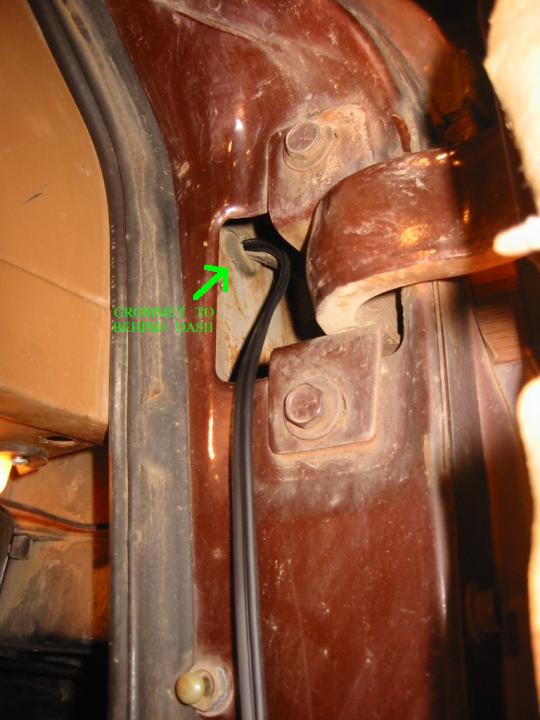
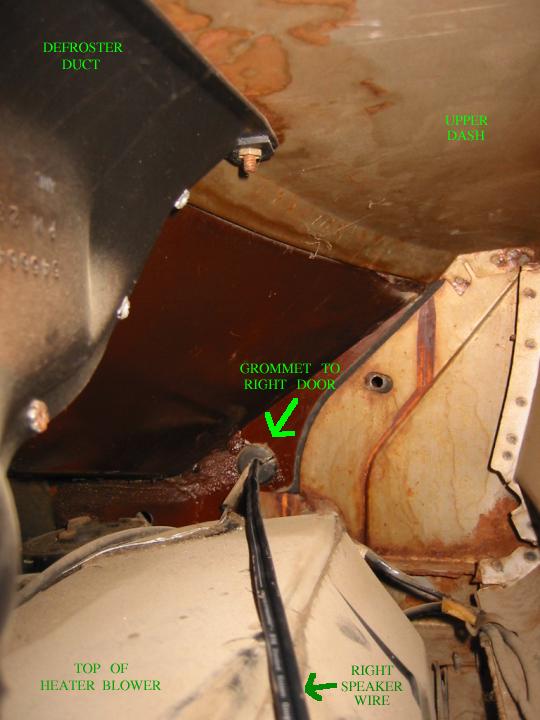
I installed the speakers first. Simply remove the door panel using a 5/32″ allen wrench and a philips screwdriver. The speaker is bolted to a small mounting panel, which is in turn screwed to the inner door frame. The speaker wire runs through a hole in the door inside a semi-circular plastic guide that prevents it from getting pinched when you open & close the door, then up behind the door hinges on the body, then through a rubber grommet at the top of the cowl and behind the dash over to the radio. Running new wire was straightforward, but getting it through the grommet by the cowl was tricky, especially since I was replacing the old 18awg wire with heavy-insulated 16awg wire. I had to duct tape the end of the old & new wires together, then pull the old wire through while pushing the new wire from the back side.
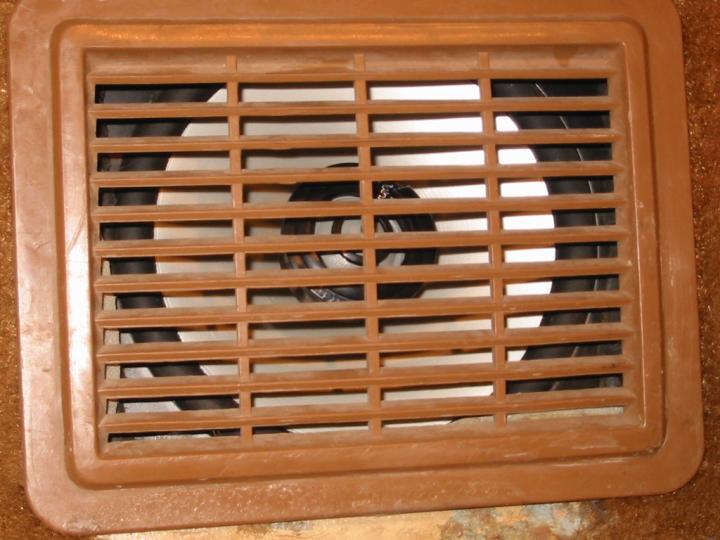
While I had the doors open, I vacuumed all the leaves & crud out of the bottom of the doors and made sure that the drain holes were clear so my doors don’t rust. The plastic rain shields that drape over the back side of the speakers were falling off and were a little small for my tastes anyway, so I replaced with with portions of plastic grocery bags. This gives them better coverage and two layers, in case one gets punctured. The drawback I later noticed is that with really low base (like the opening chords of U2’s Where the Streets Have No Name) turned up fairly loud, you can hear the bags vibrating or buzzing. Prior to installing the speakers, I also installed new window wipes on all the doors do keep most of the water from getting inside the doors in the first place. The 552i’s have an angled tweeter that can be rotated to one of 12 positions so that it points toward the listeners. This is handy, since the speakers would otherwise be facing my ankles. The new speakers fit pretty well behind the factory grille.

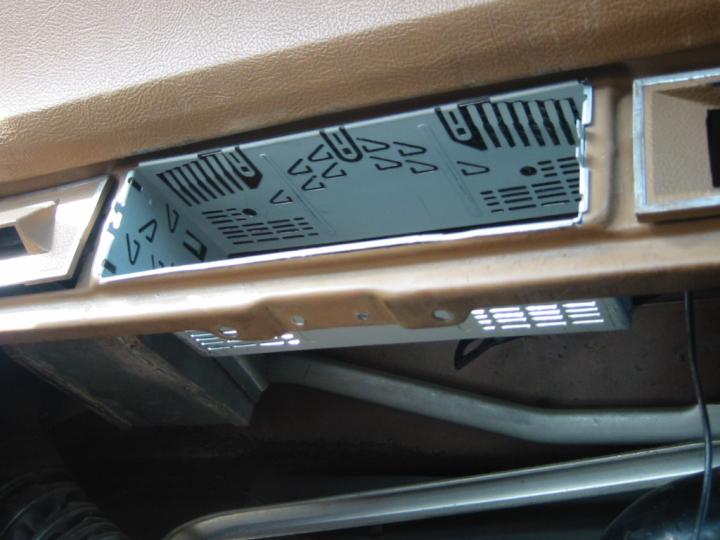
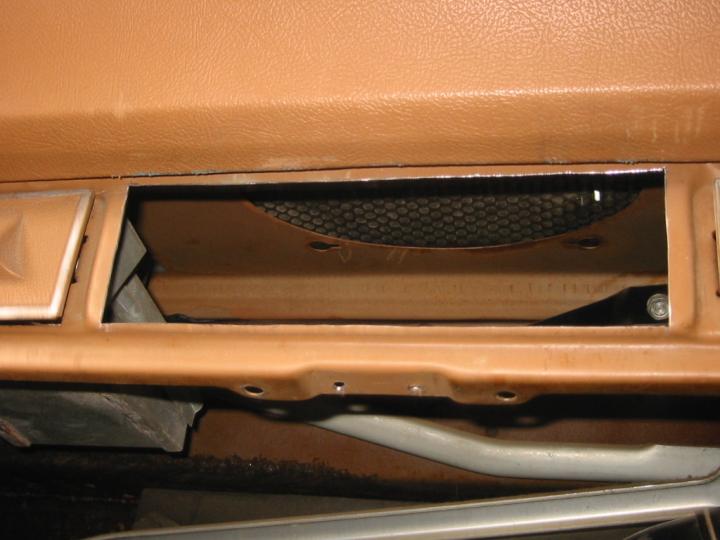
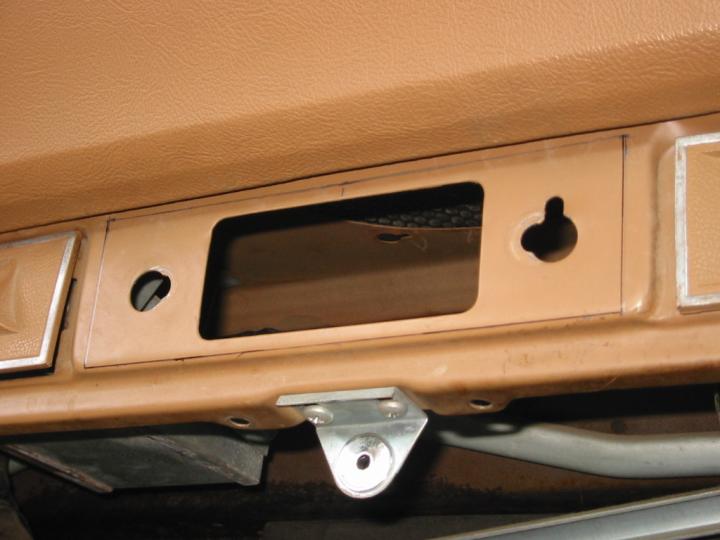
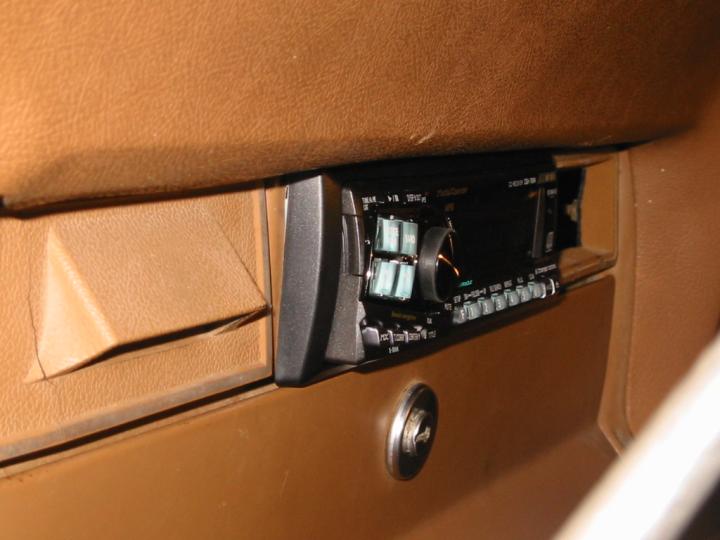
Dash cut-out
The harder part of the install was mounting the head unit itself. The Alpine head unit slips inside a metal bracket, which is in turn mounted inside the hole in your dash. The hole I had to cut was 2-3/32″ x 7-3/16″. I centered it horizontally in the raised area of the dash, and placed it as low on the raised area as I could without dropping off the bottom. This location allowed me to still fit the bezel around the radio face without interfering with the glove box door or having to cut the dash pad (although I did have to push the dash pad up out of the way to get the bezel on). I used a variety of tools to cut the dash. I started by cutting a 1/2″ wide slot on each of the four sides with a Dremel tool. I then used a fine-tooth blade in an electric saber saw to cut the bottom edge and most of the two sides. In order to cut the upper portion without goobering up the dash pad, I sawed it by hand using a hacksaw blade gripped with vice grips. All I can say about that is hand tools suck.
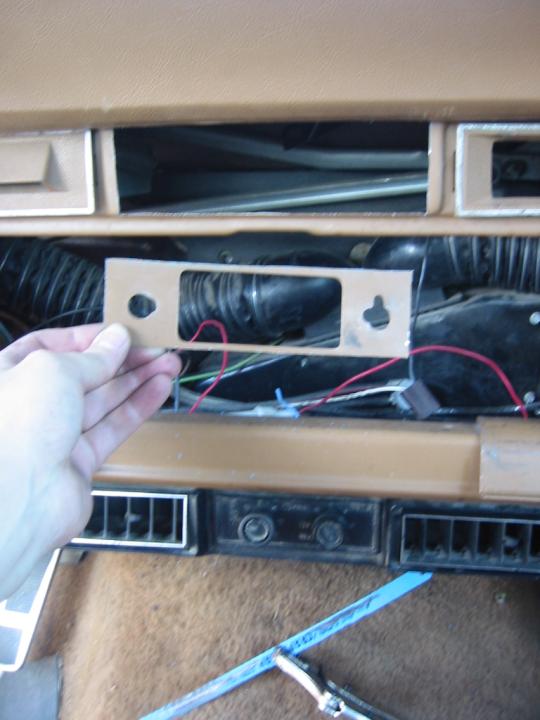
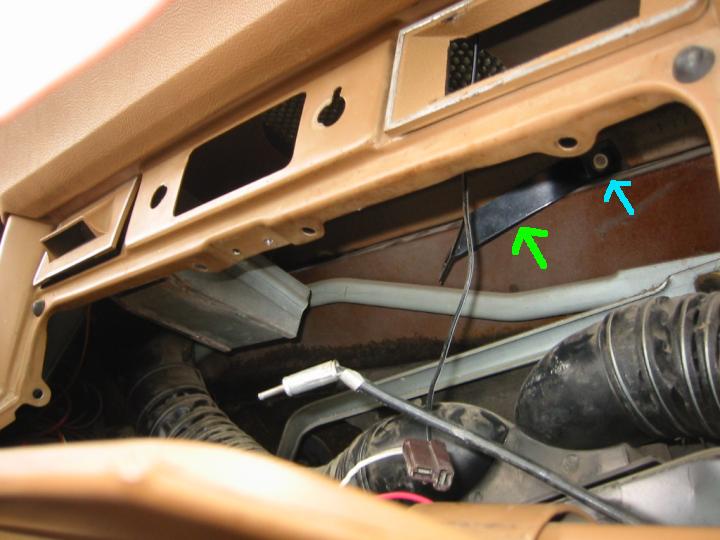
With the hole cut and the metal mounting sleeve inserted, the next step was to get a rear support bracket in place to keep the head unit from bouncing around on bumps. Conveniently, my Wag already had a fairly sturdy support bracket (green arrow) that I assume was left over from the factory radio. I had to bend it a bit to make it line up with the mounting 5mm hole on the back of the Alpine, but it works great. The bolt that mounts that bracket to the body (blue arrow) also provides an excellent ground point for the stereo.
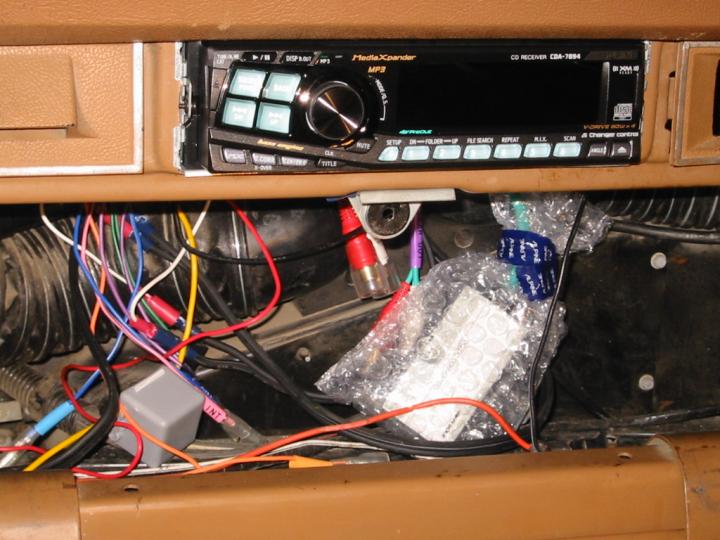
Stereo wiring
Next came the wiring. The 7894 has both pre-amp and speaker level outputs for all four speakers plus a subwoofer, plus a CD changer cable, antenna leads, power leads, etc. That makes for an awful lot of wire, and I’m not sure I’m gonna be able to get my cardboard glove box back in with it all hanging down behind the stereo (I haven’t tried yet). I used bullet connectors on the speaker wires so I could remove them if necessary. The ground and power leads got ring connectors, since they all get screwed down to existing mounting points. As mentioned earlier, I ran the ground wire to the rear mounting bracket bolt (blue arrow). The main (yellow) power wire got run to a post on the back of the ammeter in the dash. The 10 awg ammeter wire runs directly to the battery (and to the alternator, in my case, since I’ve bypassed the ammeter). The switched (red) power wire runs to a spot in the fuse box by the e-brake pedal that is specifically labeled as a radio plug, and is only hot with the key in the “run” or “accessory” positions. The 7894 includes an orange wire that should be tapped into the dash light wiring. This tells the head unit when the dash lights are on so that it can dim the display and not blind you at night. I haven’t hooked this up yet, but it can be tapped into the orange wire that runs to the glove box light. (After the first few weeks of driving around at night with the display at full brightness, I don’t think I’ll bother hooking it up, since it’s not annoyingly bright.) The 7894 also has a blue “mute” wire that lowers the volume on the stereo if your cell phone (or whatever) rings. I may try to splice it into my CB so that it mutes when I key the mic…
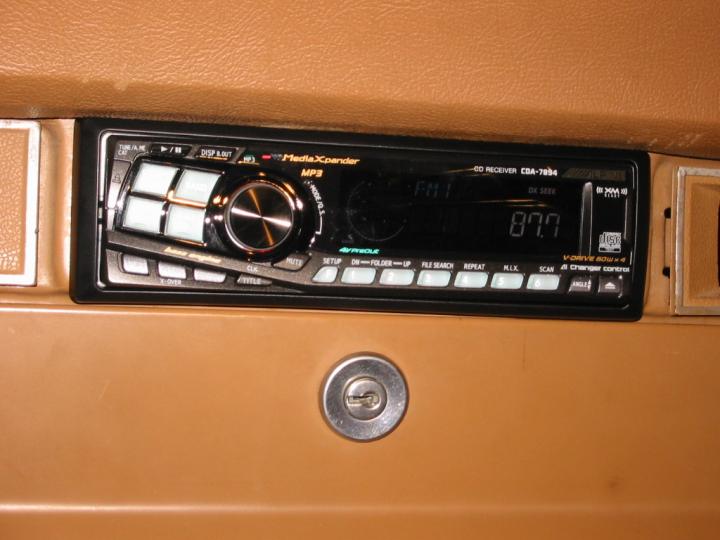
I originally expected that I wouldn’t be able to install the bezel around the radio due to the tight clearance between the dash pad and the glove box door. Fortunately, it turned out that I had cut the hole exactly where it needed to be to allow the bezel to be squeezed on. It only pushes the dash pad up slightly, and it just barely clears the glove box door. This is good, because it looked somewhat tacky without the bezel.
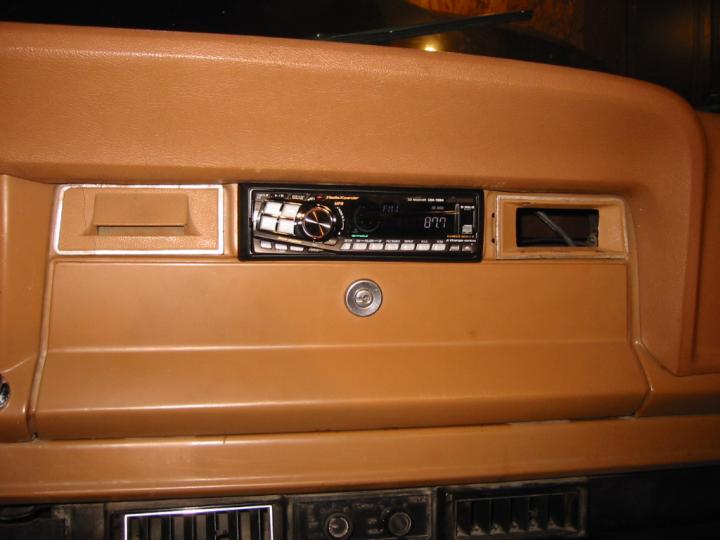
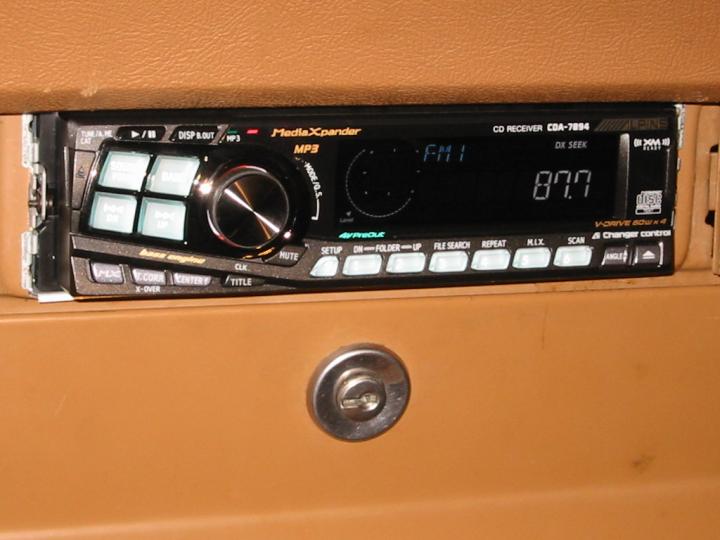
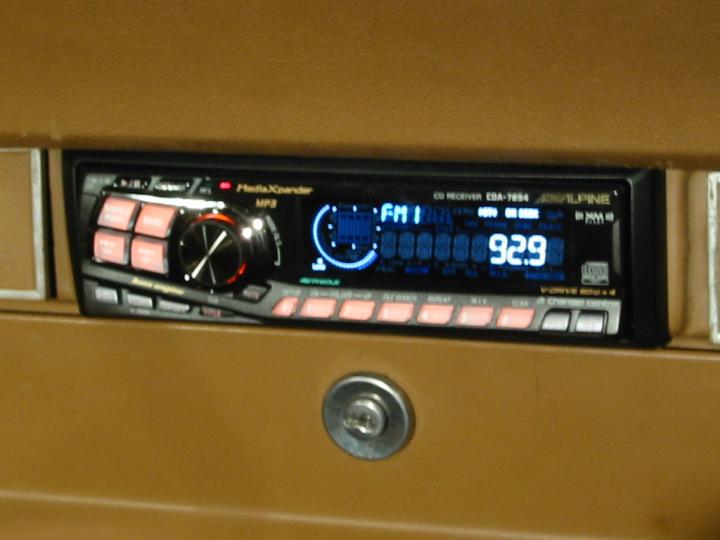
Installed
That pretty much does it for the install. My description sure makes it sound easy, but it was pretty time consuming, taking about 8 hours or so. The end result is awesome! The Alpine/Infinity combo sounds every bit as good as I’d hoped it would, even in the poor acoustics of my 25-yr-old Wagoneer. It even looks like a professional installation. At some point I’d like to install some larger (perhaps 6×9″) speakers in the rear, but that’s a ways down the road. We’ll very seldom have adults riding in the back seats, so catering the sound quality to the front seat passengers is fine for now. Besides, even the little 5.25″ front speakers put out more than enough good, clean base to rattle the body panels.
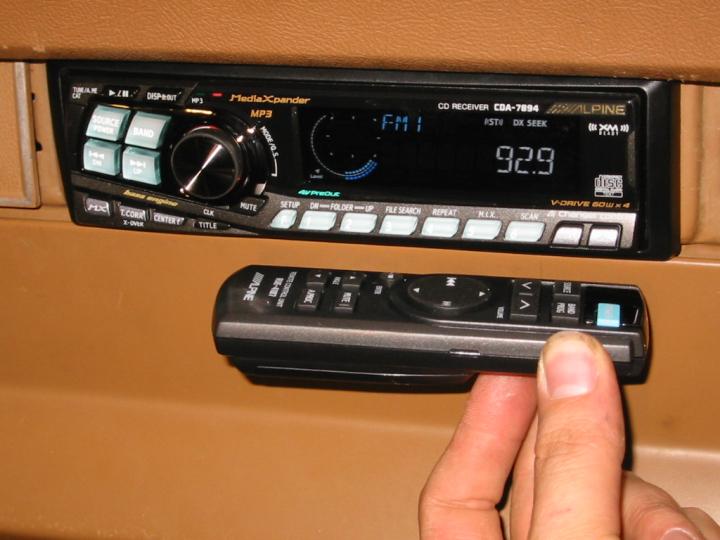
A couple things I’ve noticed about the Alpine CDA-7894: The detachable face place gets quite hot when running the unit for a while — or at least when using the CD player. I’ve never noticed any appreciable temperature increase on the face plate for the cheap Kenwood deck in my Wrangler. Also, the user interface on the Alpine isn’t the most intuitive in the world. I’m pretty good with electronics, but I still had to dig out the manual to figure out how to use all but the most basic of its features. Once I figure out some of the conventions that the designers used, I’m sure I’ll be able to guess at how to do most things. Another thing that stood out to me is that both the stereo face and the remote control are quite a bit thicker than some other stereos. It’s not a big deal for the face, but it makes the remote a lot less convenient to store. One interesting feature of the 7894 is that it can illuminate the primary buttons in either green or orange. They call it amber (which I thought would match my tan interior nicely), but it’s definitely orange.
Removal
Seven years later, almost to the day, I decided that I didn’t drive the Wag frequently enough to justify a $400 stereo. The factory stereo in my wife’s 2001 Chevy Tahoe had stopped recognizing CD’s, so I removed it and put the Alpine from the Wag in its place using adapters from Crutchfield. Crutchfield has a reputation for good products and installation support, but I had some problems that I want to document here, for lack of a better place. If you’ve read my review on Crutchfield’s web site, I’m “Ben from Lincoln, NE.” Photos from the entire Tahoe install process can be seen here.
The Tahoe originally had OnStar, a remote cassette tape deck located lower down on the dash, a non-Bose stereo, and no subwoofer. I believe Suburbans, Yukons, Sierras, and Chevrolet pickups were also available with this configuration. When I hooked everything up using the instructions provided with the adapter harness & brackets (Crutchfield item numbers 120701858, 12040GM10, and 120993002) the stereo appeared to work, but I got no sound (quite — zero volume), so I called tech support. I remembered reading something online about either the remote cassette deck or the OnStar possibly causing problems, but I couldn’t remember specifics. I mentioned this to the support person, but he swore that it must be a problem with my factory speakers in the Tahoe. Rather than waste time following his recommendation, I hunted around online and found the real solution to my problem. I want to share it here so others are saved the same frustration I had.
The remote cassette deck is attached to the factory head unit using a second wiring harness that’s not addressed by the Crutchfield adapter harness. It was now just hanging loose behind the new stereo that I’d installed. In order to get sound from the speakers, the stock amp’s remote power lead (the pink wire in that second harness) must be connected to the ignition hot (red) wire from the adapter harness. This web page at FixYa.com was where I finally found the solution.
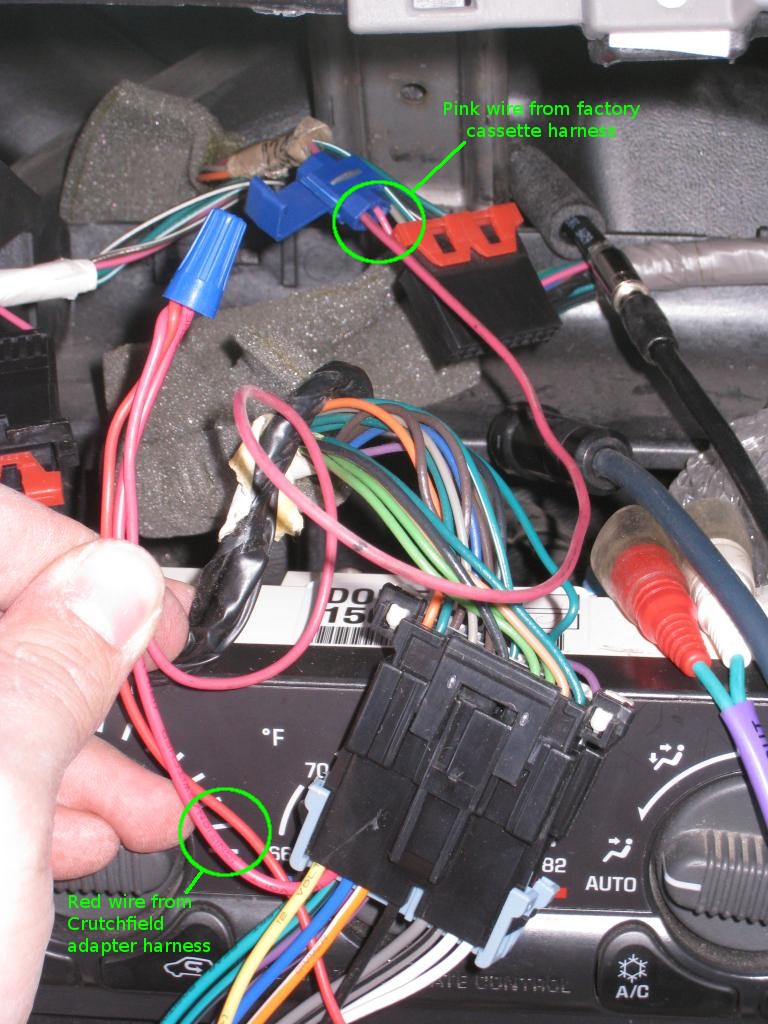
Tahoe stereo harness
Not wanting to butcher the factory harness any more than necessary, I used a splice connector to attach a new lead to the tape deck harness. I ran that wire to the wire nut which connected the Crutchfield harness to my head unit. With this connection made, everything worked perfectly. Here’s a photo detailing the connection that must be made:
My wife’s very happy to be able to listen to CD’s again, and I finally feel a little better about the $400 I spent on that head unit now that it’s going to get some real use. I just hope the pathetic user interface isn’t too frustrating for my wife.
Last updated 31 Oct 2009