Shock mount modifications
for a '95 Jeep Wrangler
Table of Contents
Front Upper
 When I did my SOA conversion, I couldn't find
shocks that were long enough and that also had the stud-style upper
shock mount. I solved that problem by making stud-to-eye conversion
brackets for the front upper shock mounts. Read details and see photos
near the bottom of the SOA conversion writeup.
When I did my SOA conversion, I couldn't find
shocks that were long enough and that also had the stud-style upper
shock mount. I solved that problem by making stud-to-eye conversion
brackets for the front upper shock mounts. Read details and see photos
near the bottom of the SOA conversion writeup.
M.O.R.E. sells similar adapters for $37.50 per pair (plus shipping).
Front Lower
I haven't modified my front lower shock mounts yet. Someday I want to move them up flush with the bottom of the axle tube. That may not happen until I upgrade my front axle.
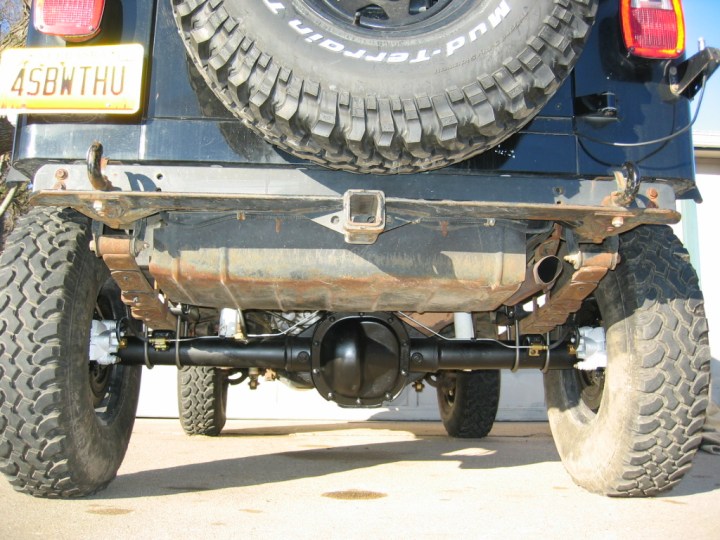
Rear Lower
The lower shock mounts on the stock YJ Dana 35 hang down about 3" below the bottom of the axle tube. These just cry out to be bashed by rocks. In fact, I smashed the adjuster knob off one of my RS9000 shocks once due to its location. When I grenaded my D35 and upgraded to a Ford 8.8", I installed the lower shock mounts so that they were flush with the bottom of the axle tube. For mounts, I bought a 5-pack of lower shock mount tabs from Speedway Motors for just $9.08 (including tax). Speedway is one of the largest mail order shops for hot rod parts, but they also happen to be local to me here in Lincoln, NE. I'm not sure why they come in a 5-pack -- I guess they assume you're gonna screw one up as you're shaping one end to match your axle radius. This was a lower cost than the generic mounts that M.O.R.E. sells for $10 each (plus shipping), although M.O.R.E.'s mounts are probably stronger and don't require manually aligning the bolt hole when welding in place.
The mounting tabs come with a rather tight radius on the axle end, and require you to grind it to fit your particular application. To strengthen the new mounts a bit and to make them easier to position while welding them to the axle tube, I reinforced them by welding a piece of 1/4" plate between the bottom edges of the two side pieces. I located this cross piece out a ways from the tube so that it wouldn't create an enclosed area to trap mud and other rust-causing liquids.
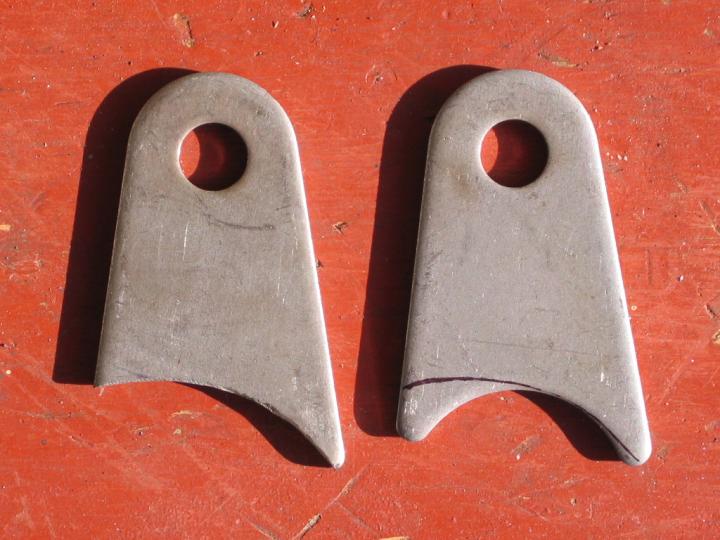


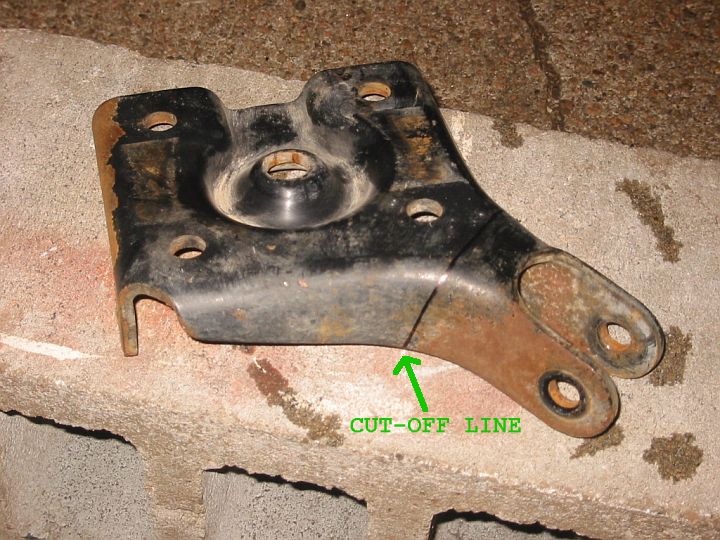
The extra time it took to weld in the cross piece and shape the mounting tabs to match the 3.25" diameter of my Ford 8.8" axle tube probably wasn't worth the few dollars I saved by not buying pre-made mounts from M.O.R.E. Then again, I'd probably still have to adjust the radius on M.O.R.E.'s generic mounts also. I realized after I finished the project that I should have just used the stock Explorer shock mounts that I had cut off the Explorer spring plates. They already had a cross brace, and they were free with the spring plates, which I had to buy anyway for my axle swap. Live and learn.
Rear Upper
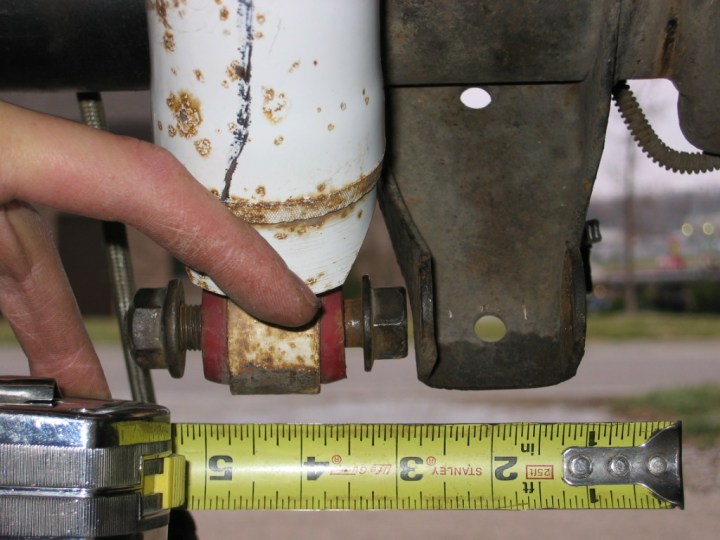
 After raising the rear lower mounts up over 2.5" during the
axle upgrade, I had two options -- either
buy shorter rear shocks (resulting in less travel), or relocate
the upper shock mounts to gain back the 2.5" of travel. I opted for
the latter route by buying
upper
shock mount extension brackets from
Mountain Off-Road Enterprises
(M.O.R.E.). I opted for the zinc-coated ones, which cost me $102.11
after shipping. The zinc coating looks just like a grade 8 bolt,
and should hold up better to the elements than spray paint on raw steel.
After raising the rear lower mounts up over 2.5" during the
axle upgrade, I had two options -- either
buy shorter rear shocks (resulting in less travel), or relocate
the upper shock mounts to gain back the 2.5" of travel. I opted for
the latter route by buying
upper
shock mount extension brackets from
Mountain Off-Road Enterprises
(M.O.R.E.). I opted for the zinc-coated ones, which cost me $102.11
after shipping. The zinc coating looks just like a grade 8 bolt,
and should hold up better to the elements than spray paint on raw steel.
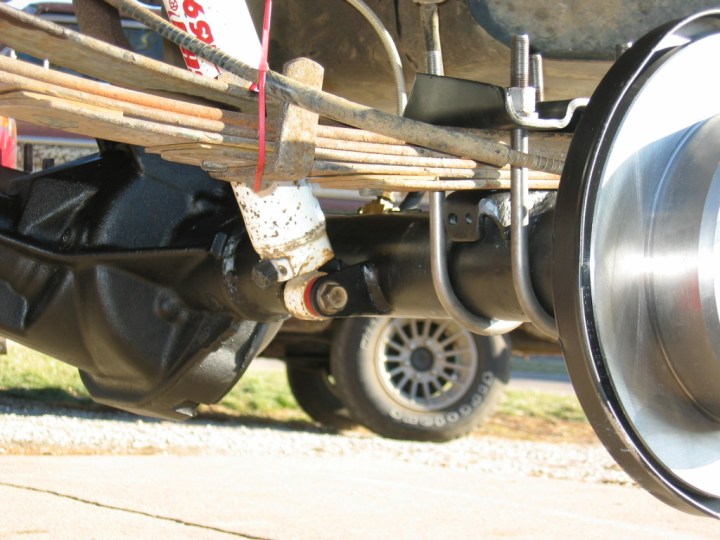
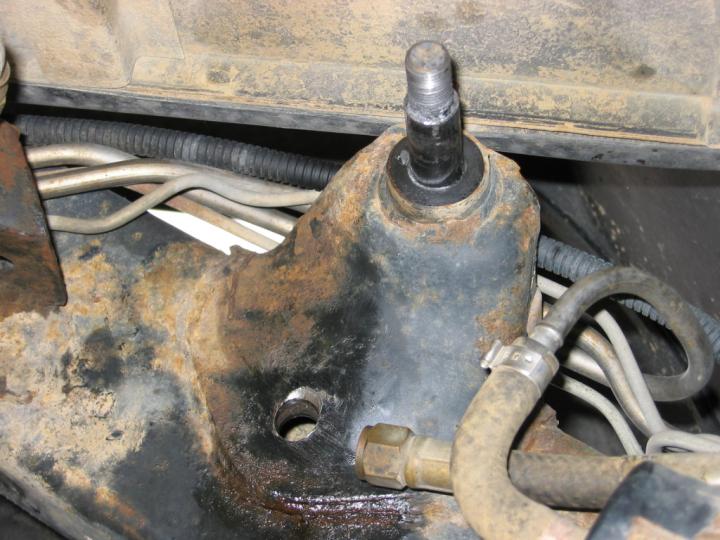
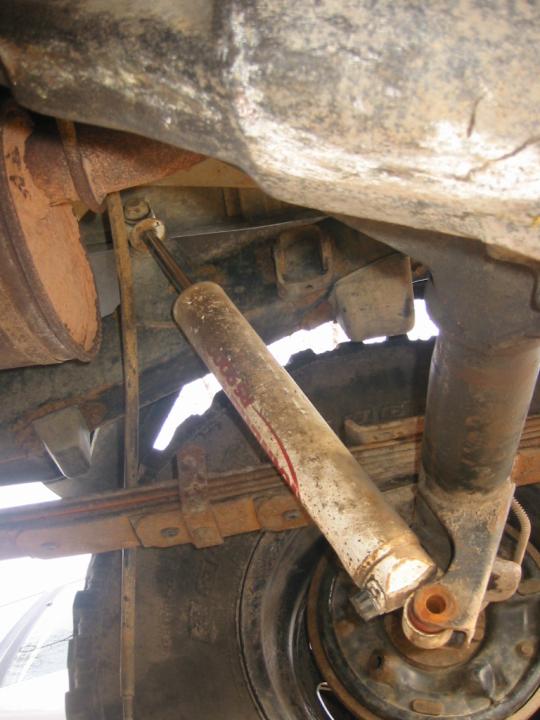
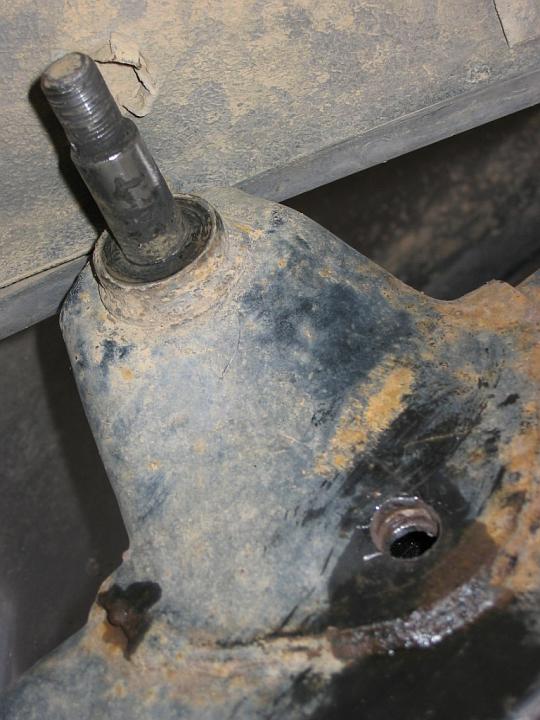
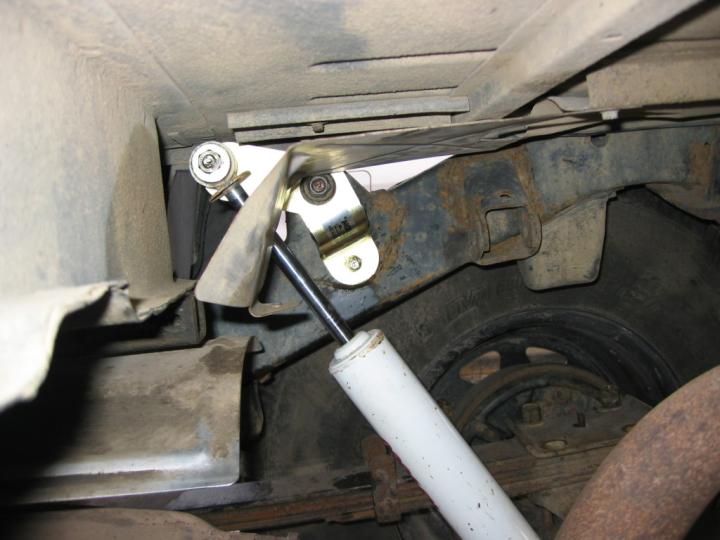
 These mounts have a tube that fits over the original upper shock mount
and a locating pin that fits into a 1/2" hole that you must drill through
the frame. The new shock mount is relocated about 3" farther forward
than the old mount and about 2" inboard. Depending on where you drill
the hole for the locating pin, it may also be a bit higher or lower
than the old mount, too. Mine ended up a wee bit higher, but not so
high that the shock eye will contact the body. The new mounting studs
are also angled slightly differently, making the lower end of the shock
really want to be about 2.5" inboard of the factory lower shock mount.
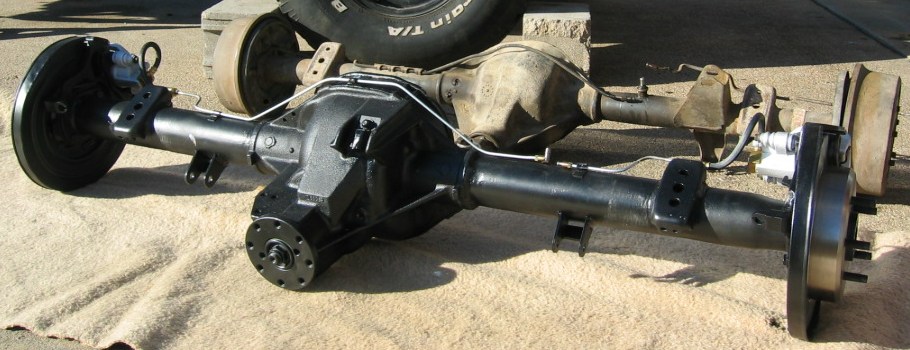
This isn't a big deal for me, since I welded new lower mounts on my new
axle at the same time and was able to relocate them. However, using
these M.O.R.E. upper shock mounts with the factory lower mounts will
certainly give your shock bushings a work out. M.O.R.E. advertises
an additional 2" of shock length with these mounts, but I would have
ended up with about 2.5" more if I'd kept the stock lower brackets.
Since my new lower brackets were now 2.5" higher
than before, these upper brackets were a perfect match.
These mounts have a tube that fits over the original upper shock mount
and a locating pin that fits into a 1/2" hole that you must drill through
the frame. The new shock mount is relocated about 3" farther forward
than the old mount and about 2" inboard. Depending on where you drill
the hole for the locating pin, it may also be a bit higher or lower
than the old mount, too. Mine ended up a wee bit higher, but not so
high that the shock eye will contact the body. The new mounting studs
are also angled slightly differently, making the lower end of the shock
really want to be about 2.5" inboard of the factory lower shock mount.
This isn't a big deal for me, since I welded new lower mounts on my new
axle at the same time and was able to relocate them. However, using
these M.O.R.E. upper shock mounts with the factory lower mounts will
certainly give your shock bushings a work out. M.O.R.E. advertises
an additional 2" of shock length with these mounts, but I would have
ended up with about 2.5" more if I'd kept the stock lower brackets.
Since my new lower brackets were now 2.5" higher
than before, these upper brackets were a perfect match.
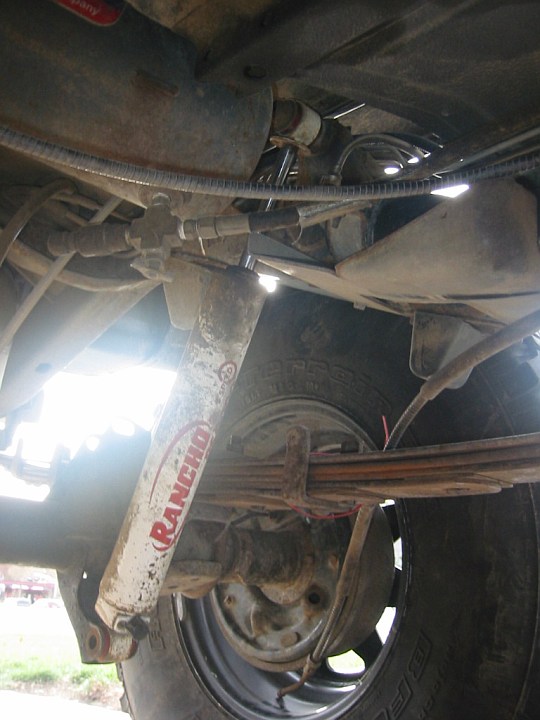
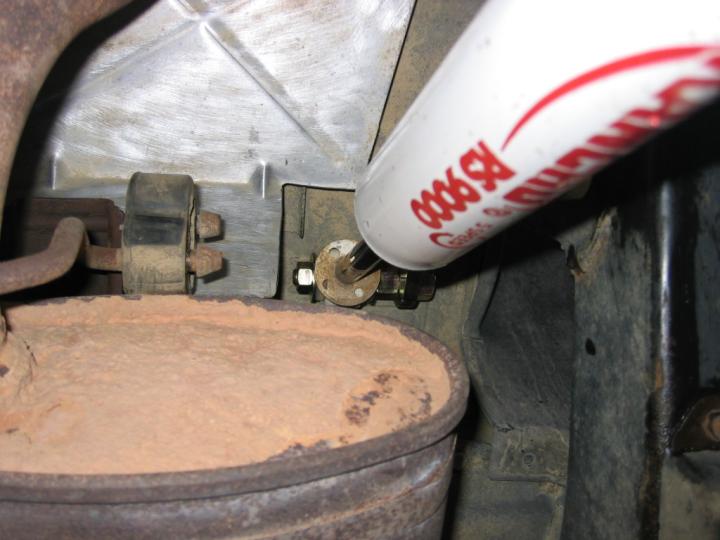
Another advantage of the M.O.R.E. mounts is that, by moving the upper mounts farther forward for a more reclined shock angle at full stuff, the shocks don't have to compress as far even with the same amount of axle travel, thus allowing more travel with a shorter shock. Theoretically, the more reclined shock angle should also make the shocks feel somewhat softer. One friend of mine who runs them told me that the opposite is true. Personally, I can't tell a difference, but that may be due in part to my adjustable Rancho RS9000 shocks that I'm constantly tweaking.


The bad thing about these mounts is that they require you to drill two 1/2" diameter holes through 1/2" thick steel at the frame (I was surprised it was that thick). That's not pleasant while lying on your back under the Jeep. Through many hours of trial and error, I found that using cutting oil (normally a good idea) did more harm than good. It's best to start with a small bit (1/8") and use really slow rpm's with lots of force. I went through several dull bits before I got that first 1/8" pilot hole drilled. With the pilot hole finished, the rest went pretty fast. I gradually used larger and larger bits to hog out the hole to the final diameter of 1/2". By gradually increasing the bit size, you can quickly drill through the entire depth of the hole before each bit gets dull. I found that increasing the bit size by about .05" (slightly over 1/32") worked well.
When I installed another set of these two years later on a friend's YJ, I had a different experience. By that time, I'd bought a Drill Doctor DD750X drill bit sharpener, which is God's gift to metalworkers. The ability to perfectly sharpen a bit in 60 seconds rather than plodding along with dull bits or making frequent trips to the hardware store for new ones was a life saver. With sharp bits, cutting oil IS a good thing, as it keeps the bit cool, which in turn keeps it sharp longer. I still had to sharpen my 1/8" bit 3-4 times for each initial pilot hole, but the entire drilling process for both holes only took about 3-4 hours instead of several days. I enlarged my bits in approximately 1/16" increments, which allowed the subsequent bits to cut through like butter. Getting too eager and trying to jump up to the 1/2" bit too quickly slowed progress considerably until I reverted back to the other approach. Drilling these holes (especially the one on the passenger side) still isn't a pleasant experience, but it is much better with sharp bits.
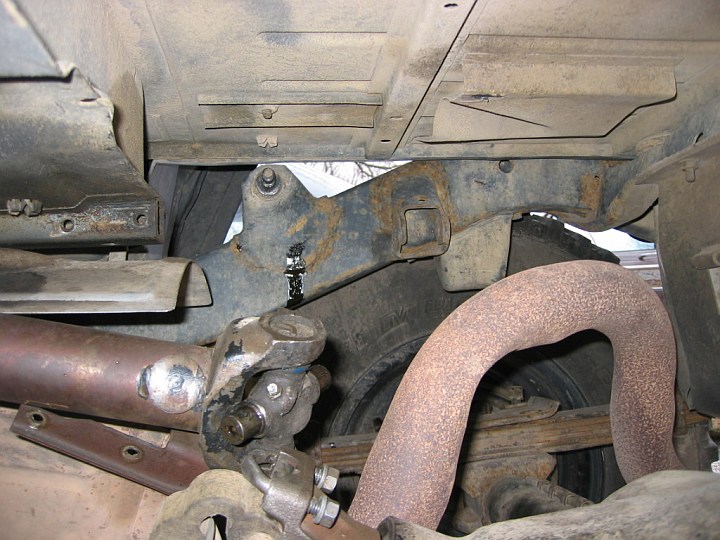
Of course, before you can drill those holes, you have to clear enough room under the tub for your drill. On the driver side, that meant removing the onboard air tank that is normally bolted to the bottom of my tub right next to the shock mount. On the passenger side, that meant removing the muffler and tailpipe. I tried unsuccessfully to separate the muffler from the 1-yr-old stainless steel catalytic converter, so I ended up disconnecting the entire exhaust system from the Jeep, wrestling it out of its mounts in one piece, and sliding it off to the side so that I had enough clearance to get a straight shot to drill the hole. It's never easy...
You also need to make sure that the hole is in exactly the right spot. When test fitting the bracket, make sure that the tube is centered around the old mounting pin (it won't fit snuggly until after you drill the hole), then rotate the mount back & forth so that the locating pin leaves a mark on your frame. You can then measure 1/4" out from this mark for the center of your hole. If you drill the hole in the wrong spot, you'll end up having to somehow enlarge the hole in one direction (AMHIK)... and remember, the steel in the frame is 1/2" thick here.
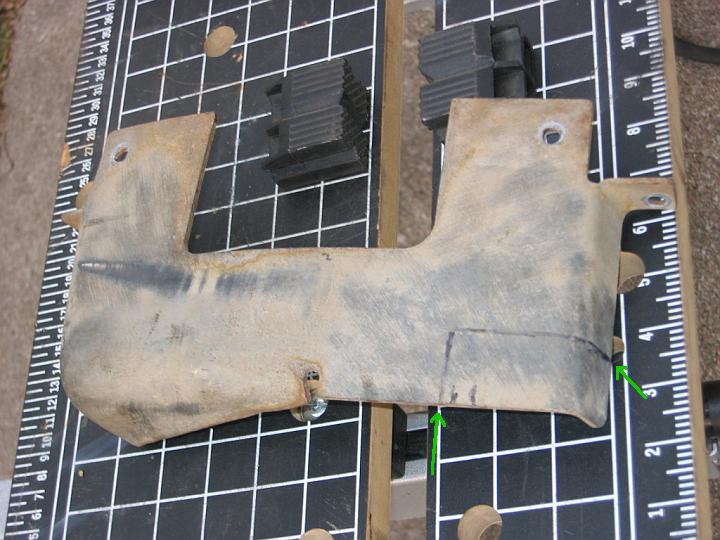
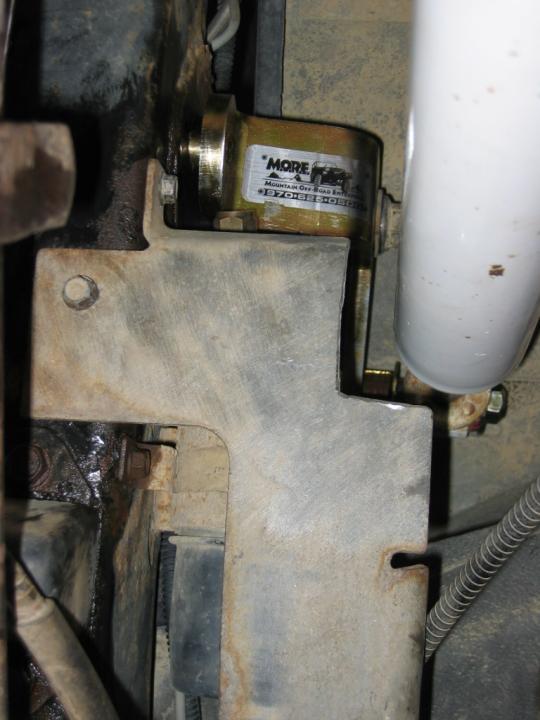
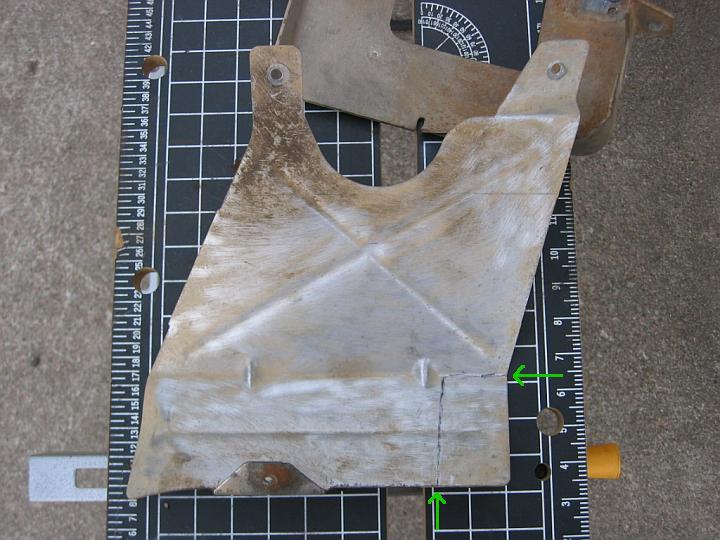
Of course, moving the upper shock mounting point 3" farther forward causes clearance problems with other objects under the body tub. On the driver side, I needed to cut away a 1.25" x 2.5" rectangle from the corner of the fuel filter skid plate. While I had the skid plate off, I replaced the 8-yr-old fuel filter with a new one (remember that the fuel line is under pressure!). If you're still using the stock lower shock mounts, you may have to adjust those dimensions. Remember to leave enough clearance for the shock to move around when the axle droops and compresses! On the passenger side, I needed to cut away a 1.75" x 3.5" rectangle from the corner of the tailpipe heat shield.
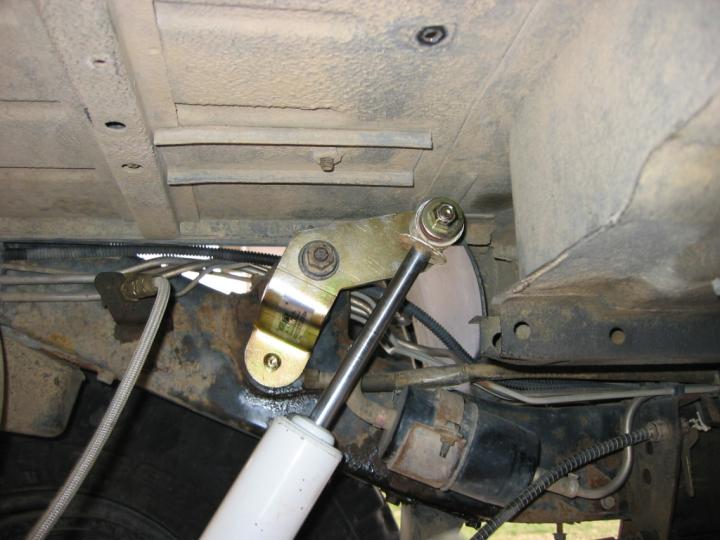
With the heat shield & skid plate trimmed, just re-connect the exhaust, bolt the mounts and shocks in place, and you're good to go!
This writeup describes how things should have been done, of course. I spent many, many hours over several days drilling those stupid holes. I dulled a half dozen titanium and cobalt drill bits before I figured out not to use cutting oil and to increase the drill bit size gradually. I also spent quite a while trying to remove the muffler before I finally gave up and figured out just the right way to dislodge it so I could drill the hole without completely removing the exhaust from the Jeep. It was a heck of a lot of work to install something as conceptually simple as those little shock mount extensions.
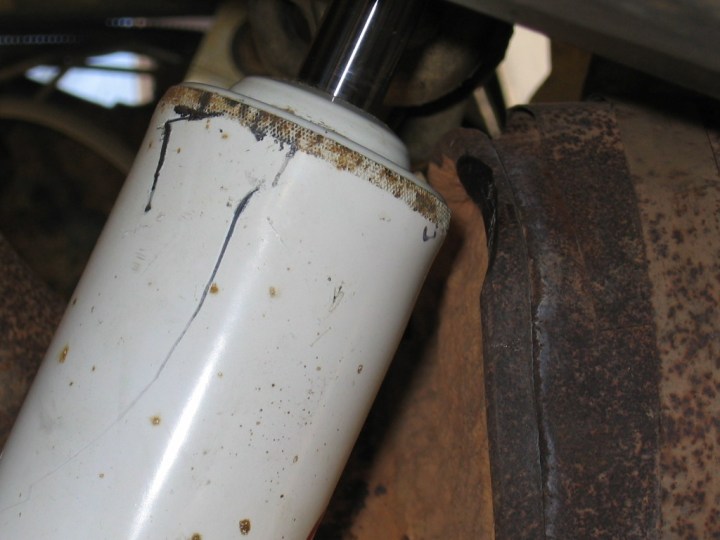
After I got both the upper & lower rear mounts in place and the new Ford 8.8" axle installed, I found that the right side shock contacts the rear lip of the muffler at full droop. I hade to clearance the muffler's rear lip a bit with an angle grinder to prevent rubbing. I'm not sure if this would have been an issue with the factory lower mounts or not. Someday I'll install a new cat-back exhaust system, and I'll move the muffler forward an inch when that happens.
Some years later, the polyurethane bushings in my RS9000 shocks began to deteriorate. Read about how I replaced them.
Do you like this site?
Help me keep it going by throwing a few pennies my direction.
![]()
![]()
![]()
![]()
created 6 Jan 2004
last updated 19 Jan 2006 Obi-Wan (obiwan@jedi.com)
Links on this page to Amazon are part of an affiliate program that helps keep Jedi.com operational. Thank you for your support!
